Embroidery is not just a hobby; it’s a form of artistic expression that allows us to create beautiful designs with needle and thread.
And while having the right tools is essential, sometimes it can be a challenge to find the perfect embroidery stand to hold our fabric in place.
But fear not, for today we’ll embark on a creative journey to make our very own DIY embroidery stand using simple materials you may already have at home.
Materials needed:
- Medium-sized cardboard box
- 3 paper towel rolls (PT tubes)
- Scissors
- Pencil for marking
- Embroidery hoop (for marking the cardboard)

Now, let’s jump into the step-by-step process of creating your DIY embroidery stand:
Step 1:
Prepare the Cardboard Base Start by finding a medium-sized cardboard box that is sturdy enough to hold your fabric.
Lay it flat on a table or any flat surface.
This will serve as the base of your embroidery stand.
Step 2:
Mark the Positions for PT Tubes , draw the outline circle using embroidery hoop on the cardboard.
Take the 3 paper towel rolls (PT tubes) and arrange them in a triangle shape on the cardboard base.
Space them out evenly, making sure they are stable and won’t move around once attached.
Using a pencil, carefully mark the positions of the PT tubes on the cardboard.
This will help you align them properly during the assembly process.
Step 3:
Cut Openings for PT Tubes Using a pair of scissors, carefully cut out circular openings on the marked positions of the cardboard base.
These openings should be slightly smaller than the diameter of the PT tubes so that they fit snugly.
Step 4:
Take the 3 paper towel rolls (PT tubes) and cut off a small portion from the top of each tube.
This will create a space to hold the embroidery hoop securely. Make sure the cut is just enough to fit the hoop snugly.
Take each PT tube and insert them into the corresponding openings on the cardboard base. Make sure they are securely fitted and standing upright.
Step 5:
Secure PT Tubes To ensure the PT tubes stay in place, you can reinforce them by applying a small amount of glue or tape around the base where they meet the cardboard.
This will provide extra stability and prevent any wobbling during your embroidery work.
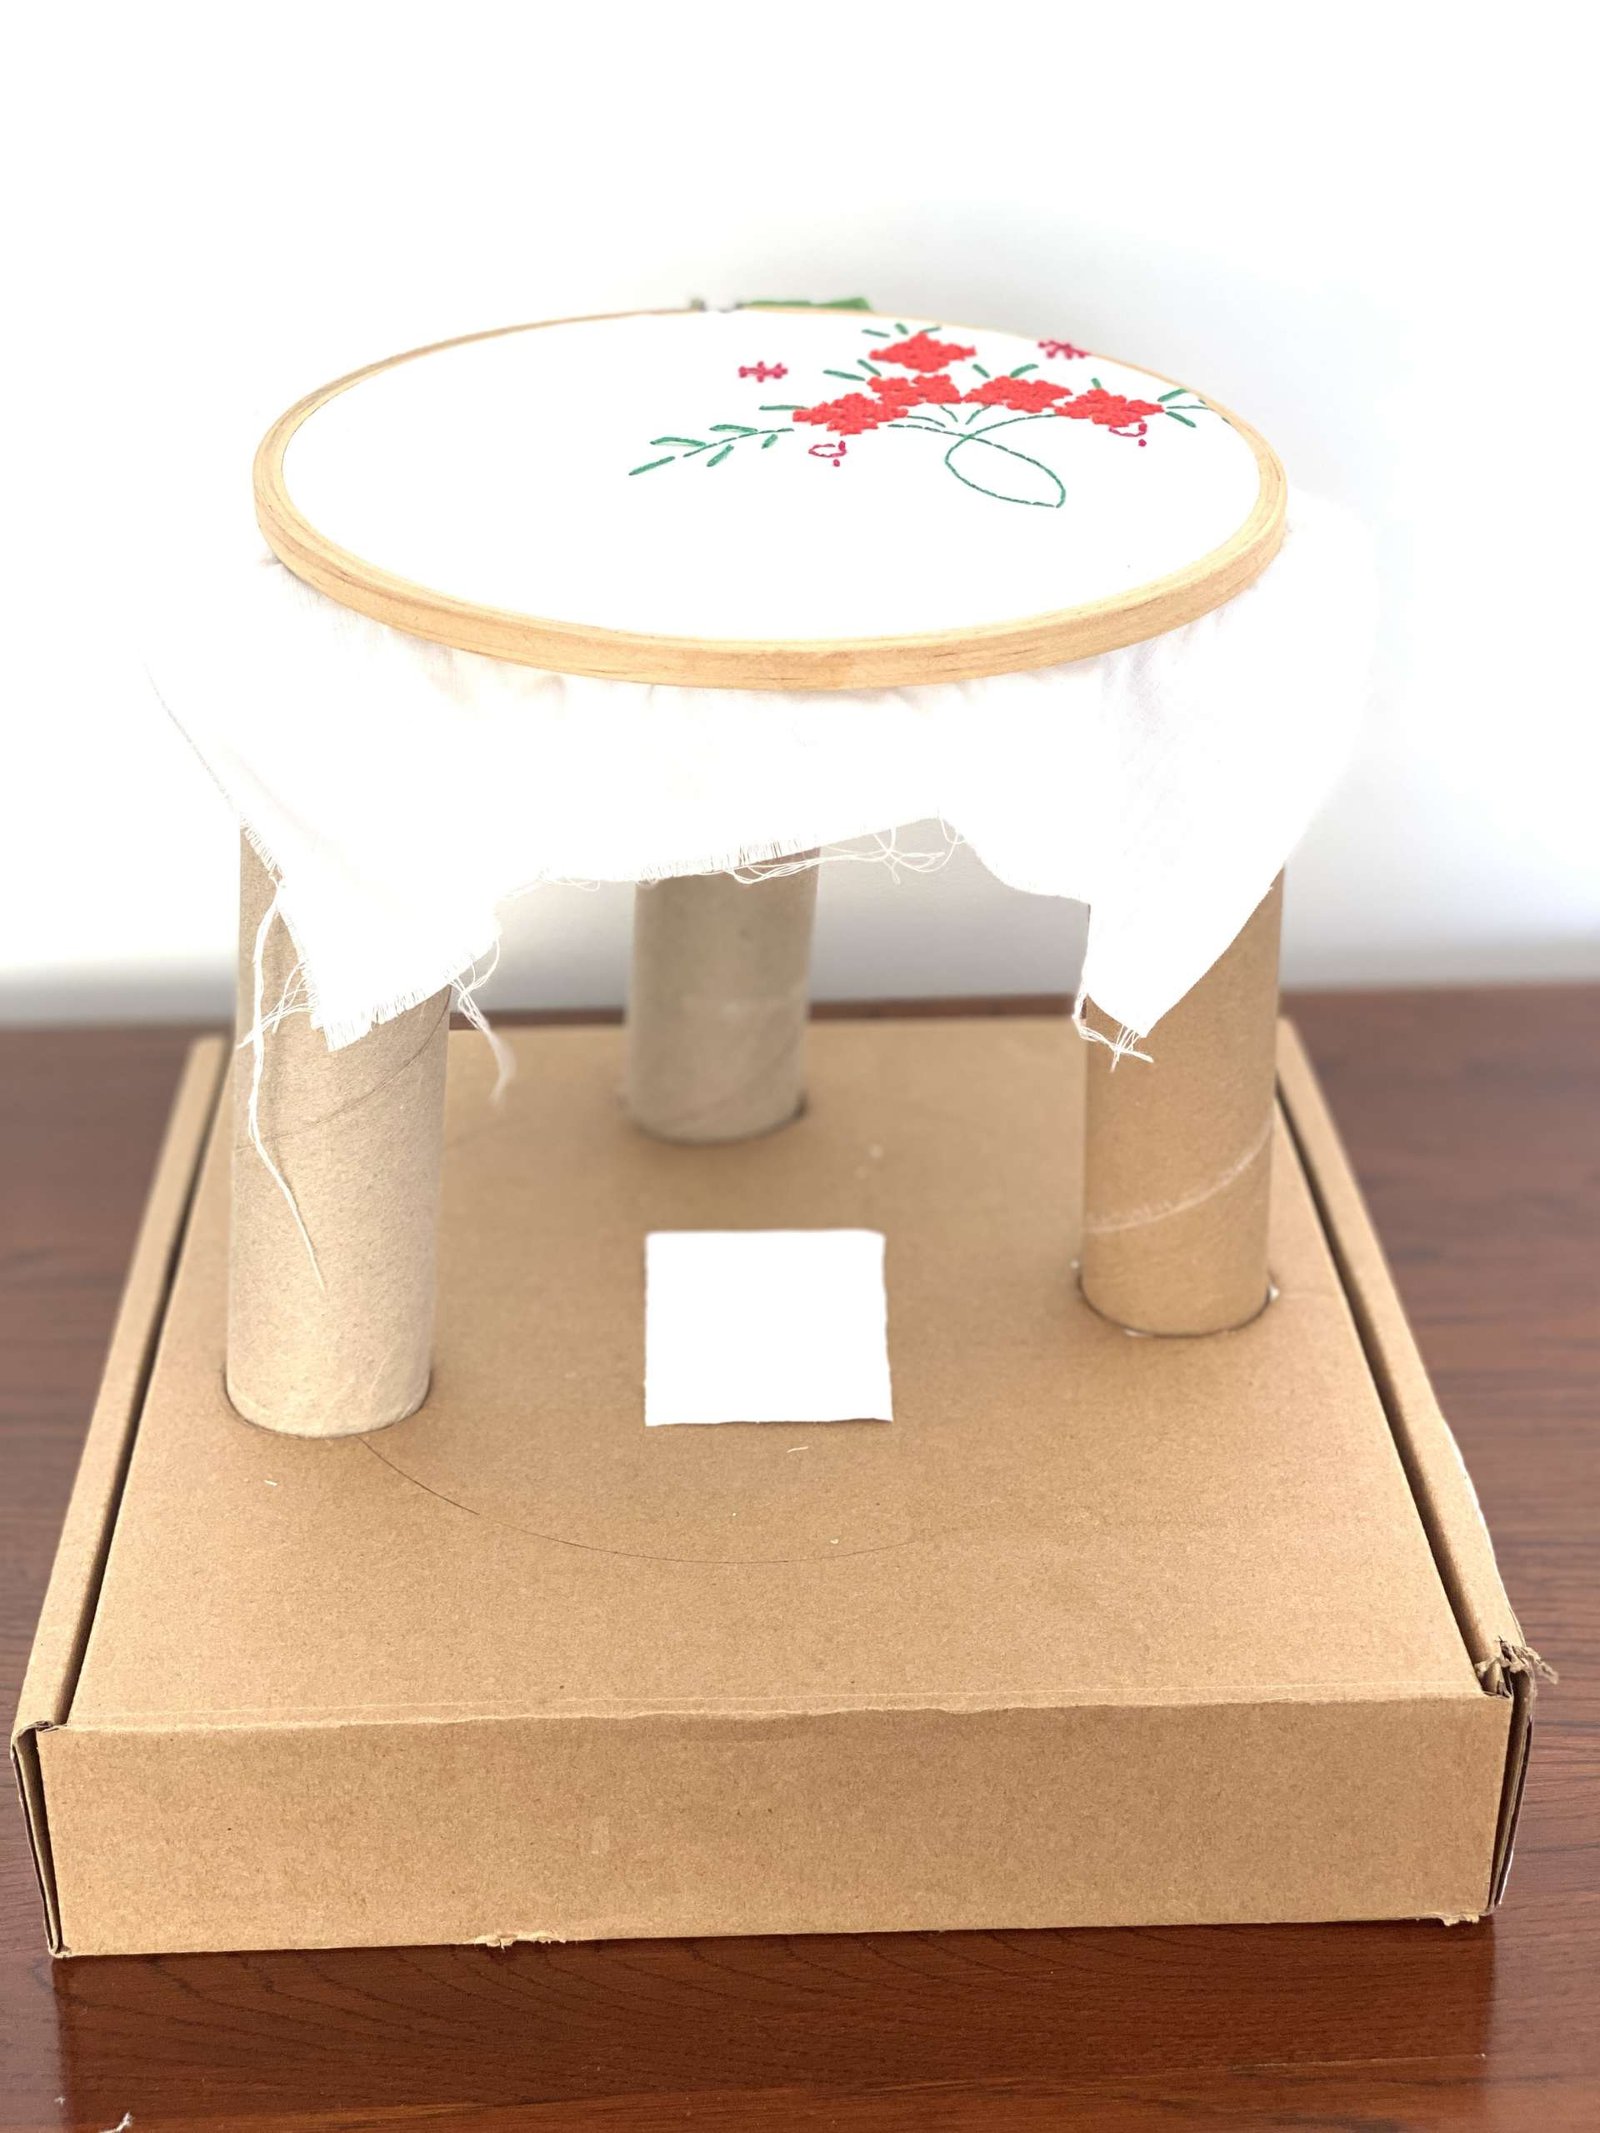
Step 6:
Mark the Embroidery Hoop Placement To determine the appropriate placement for your embroidery hoop, simply position it on top of the PT tubes.
This will serve as a guide for future embroidery projects, ensuring your fabric is properly aligned and tensioned.
Please watch the video below:
And there you have it – your very own DIY embroidery stand!
Now you can enjoy the convenience and stability it provides while you embark on your embroidery adventures.
This simple and cost-effective solution allows you to focus on your stitching without the hassle of fabric slipping or being held by your hands alone.
Remember, embroidery is a journey of creativity and self-expression.
Having a reliable embroidery stand can make all the difference in bringing your designs to life.
So, gather your materials, follow these steps, and embark on a crafting adventure that will elevate your embroidery experience to new heights
Happy stitching!